A Beginners Guide to Overclocking AMD Ryzen Processors


Unlocking Hidden Performance: A Beginner’s Guide to Overclocking AMD Ryzen Processors
Overclocking an AMD Ryzen processor is one of the most rewarding ways to extract free performance from your PC. Whether you are gaming, rendering video, or compiling code, a well-tuned overclock can deliver a tangible boost in frame rates and application speed. For beginners, the process can seem intimidating, but modern Ryzen chips—particularly those based on the Zen 2, Zen 3, and Zen 4 architectures—are designed with significant headroom for performance tuning. This guide provides a clear, step-by-step roadmap, covering essential hardware, software tools, BIOS settings, stability testing, and safety precautions.
What is Overclocking and Why Ryzen Excels
Overclocking means running your processor at a higher clock speed than its factory specification. AMD’s Ryzen processors are especially overclocking-friendly because they use a modular chiplet design and a mature manufacturing process. Unlike Intel’s K-series chips, many Ryzen models (including non-X variants) allow overclocking on B-series motherboards, lowering the cost of entry. The key metric is the “boost clock”—the maximum speed a single core can reach under ideal conditions. Overclocking locks that speed across all cores, ensuring consistent performance during multi-threaded workloads.
Hardware Preparation: What You Need Before You Start
Motherboard Selection: A B550 or X570 (for AM4) or B650/X670 (for AM5) chipset is ideal. These boards feature robust voltage regulation modules (VRMs) that handle the increased power draw during overclocking. Cheap A-series boards often lack sufficient VRM cooling, leading to thermal throttling or instability.
Cooling Solution: Overclocking generates additional heat. A high-quality air cooler (e.g., Noctua NH-D15) or a 240mm/360mm liquid cooler (e.g., Corsair H150i or Arctic Liquid Freezer II) is non-negotiable for sustained all-core overclocks. Stock coolers are only suitable for slight undervolting, not aggressive frequency increases.
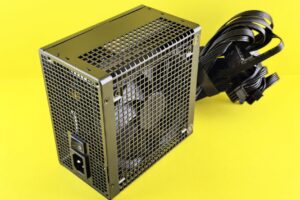
Power Supply: A 650W 80+ Gold unit is the minimum for a mid-range Ryzen 5 or 7. High-end Ryzen 9 chips drawing 200W+ under load require a 750W–850W power supply. Unstable voltage can corrupt system files.
Thermal Paste: High-quality thermal paste (e.g., Thermal Grizzly Kryonaut or Arctic MX-6) ensures optimal heat transfer between the CPU and cooler.
Monitoring Software: Install HWMonitor, HWiNFO64, or Ryzen Master before you begin. These tools track voltage, temperature, and clock speeds in real time.
Essential Software Tools
- AMD Ryzen Master: The official tuning utility. Use it for preliminary testing and voltage checks. For final stability, rely on BIOS settings.
- Cinebench R23: A free benchmark that stresses all cores simultaneously. Run it before and after overclocking to measure performance gains.
- Prime95 or OCCT: Stress-testing tools that push the CPU to its thermal and voltage limits. Use the “Small FFTs” (Prime95) or “Large Data Set” (OCCT) setting.
- CPU-Z: Validates your overclock and shows real-time core speed, voltage, and memory timings.
Step 1: Baseline Testing and BIOS Familiarization
Before changing any settings, record your baseline performance. Set your BIOS to “Load Optimized Defaults.” Run Cinebench R23 once and note the multi-core score. Monitor peak temperatures and voltages during the run. For a Ryzen 5 5600X using a stock cooler, expect temperatures around 80–85°C and a score near 11,500. This data gives you a reference point.
Enter the BIOS (press Del or F2 during boot). Locate the “OC” or “Ai Tweaker” section. Disable two power-saving features: Core Performance Boost (CPB) and Global C-states. These features lower clocks under light load, which interferes with manual overclocking. Also set Load Line Calibration (LLC) to “Medium” or “Level 3.” LLC prevents voltage droop under load, maintaining stability.
Step 2: Setting the Core Ratio and Voltage
Manual overclocking involves adjusting two primary values: the Core Ratio (multiplier) and the CPU Core Voltage (vCore).
- Core Ratio: This dictates the clock speed. For example, a multiplier of 46 with a 100 MHz base clock equals 4.6 GHz.
- CPU Core Voltage: Increases are usually needed for stability above stock speeds. Start with a safe voltage: for Ryzen 5000 series, stay below 1.35V for daily use. For Ryzen 7000 series, cap at 1.30V due to higher thermal density.
Procedure:
- Set the core ratio to the desired target. For a first-timer on a Ryzen 5 5600X, start at 4.6 GHz (multiplier 46).
- Set vCore to 1.25V (an offset that is often stable and cool).
- Save and exit BIOS. Boot into Windows and run Cinebench R23. If the system crashes or blue-screens, reboot, return to BIOS, and increase vCore by 0.025V increments (e.g., to 1.275V).
- If the benchmark completes without crashing, check peak temperatures. If they exceed 90°C, reduce the multiplier by 100 MHz or lower the voltage.
Step 3: Stress Testing for Stability
Stability testing is non-negotiable. A system that passes Cinebench may still crash during a 30-minute gaming session.
- Run Prime95 (Small FFTs) for at least 1 hour. Use HWiNFO64 to monitor the “CPU Core (Tctl/Tdie)” temperature. If it exceeds 95°C, your cooling is insufficient—reduce voltage or clock speed.
- Run OCCT (CPU & RAM) for a combined stress test. Memory instability often mimics CPU overclock failures.
- Real-World Testing: Run a demanding game (e.g., Cyberpunk 2077 or Cinebench’s multi-thread test) for 4+ hours. If it crashes, tweak vCore upward by 0.0125V.
Common Stability Signs:
- Error messages in the Windows event log (Event ID 41 or 6008).
- Sudden black screens or system freezes.
- Flickering or artifact generation during benchmarks.
Step 4: Fine-Tuning with Precision Boost Overdrive (PBO)
If manual overclocking is too time-consuming, AMD’s Precision Boost Overdrive offers an excellent alternative. PBO allows the CPU to boost higher than stock when thermal and voltage headroom permits. It’s especially effective on Ryzen 7 and 9 chips.
To enable PBO:
- Enter BIOS and set PBO to “Advanced” or “Enabled.”
- Set PPT (Package Power Target) to your cooler’s limit (e.g., 150W for a 240mm AIO).
- Set TDC and EDC to “Motherboard Limits” or manually 120A/150A.
- Experiment with a negative Curve Optimizer offset (e.g., -10 to -30). This reduces voltage per clock cycle, lowering temperatures and potentially allowing higher sustained boosts. Use Ryzen Master to test stability per core.
Step 5: Memory Overclocking – The Ryzen Secret
Ryzen processors are heavily dependent on memory speed. The internal Infinity Fabric (FCLK) scales with RAM frequency. For Ryzen 5000, aim for DDR4-3600 MHz with a 1:1 FCLK ratio (1800 MHz). For Ryzen 7000 on AM5, target DDR5-6000 MHz (FCLK 2000 MHz).
Steps to Overclock RAM:
- Enable XMP/DOCP in BIOS. If it fails to boot, manually set voltage to 1.35V (DDR4) or 1.25V (DDR5) and loosen timings (CL18–CL20).
- Use Ryzen DRAM Calculator (free tool) to find optimal timings. Input your RAM dies (e.g., Samsung B-die, Hynix M-die).
- Stress test with MemTest86 (bootable USB) for at least one full pass. Errors cause corruption and crashes.
Voltage Limits, Thermal Throttling, and Longevity
Voltage is the silent killer. Even with excellent cooling, sustained vCore above 1.40V degrades Ryzen silicon over months or years. For daily use on Ryzen 5000, stay below 1.35V—ideally 1.30V. For Ryzen 7000, 1.30V is the firm ceiling.
Thermal Throttling: Ryzen CPUs begin throttling at 95°C (Tjmax). If your stress test hits 90°C, you have no headroom. Monitor CPU Tdie (actual die temperature) not just socket temperature.
Chipset-Specific Notes:
- Ryzen 3 (3000 series): Older chips have less VRM tolerance; avoid 1.35V+ on B450 boards.
- Ryzen 5 (5000 series): Sweet spot is 4.6–4.8 GHz all-core with 1.25–1.30V.
- Ryzen 7 (5000 series): 8-core chips benefit from PBO over manual clocks due to thermal density.
- Ryzen 9 (7000 series): Use Curve Optimizer to tame aggressive stock voltage spikes.
Troubleshooting Common Beginner Issues
System Fails to Boot After Overclock:
- Clear CMOS (remove motherboard battery for 30 seconds or short the CLR_CMOS jumper).
- Boot with a conservative multiplier (e.g., 4.0 GHz) and voltage (1.20V).
High Idle Temperatures:
- Check cooler mounting and thermal paste spread.
- Disable Global C-states only if needed; otherwise, enable Cool ‘n’ Quiet for low-power idle.
Random Shutdowns in Games:
- Usually voltage instability. Increase vCore by 0.0125V.
- Verify LLC is set to Level 3–4—too high LLC overvolts the CPU at idle.
Memory Errors after Overclock:
- Lower RAM speed by one bin (e.g., 3600 to 3466 MHz).
- Increase DRAM voltage to 1.40V (DDR4) or 1.30V (DDR5) if within safe limits.
Logging Your Overclock
Maintain a simple log: note the multiplier, vCore, LLC level, Cinebench score, peak temperature, and stress test result. If you upgrade your cooler later, you can return to these settings and push further. This log also helps when troubleshooting—many overclocking issues are cumulative, not isolated.
A successful overclock is one that sustains a 5–15% performance improvement without sacrificing system reliability. Take your time, monitor temperatures obsessively, and never be afraid to start lower than your ambition suggests. Every chip is different—silicon lottery means your Ryzen might excel at 4.7 GHz while another sample needs 1.35V for the same speed. Your goal is stability, not a record.